Articles > Home Gardening Tips
Growing your own food at home has become increasingly important in today's society. It not only allows individuals to have access to fresh, healthy produce but also brings various other benefits to the table.
One of the key reasons for growing your own food at home is the ability to lower your foodprint. By cultivating your fruits, vegetables, and herbs, you decrease the reliance on commercially grown produce that often travels long distances, contributing to carbon emissions. You have control over the use of pesticides and fertilizers, which means you can opt for organic and sustainable practices, thereby reducing harm to the environment.
Besides reducing your impact on the planet, growing food at home provides a relaxing way to connect with nature. It allows you to take a break from the hustle and bustle of daily life and immerse yourself in the therapeutic process of nurturing plants. Gardening has been shown to lower stress levels and improve mental health, as being around plants and green spaces has a calming effect on our minds.
Furthermore, growing your own food can fit the demands of busy lives and tight budgets. With time constraints and rising food prices, maintaining a garden at home provides a convenient solution. You can grow crops that suit your dietary preferences and customize your garden to fit your available space. This results in savings on grocery bills and the opportunity to enjoy homegrown, wholesome ingredients.
In conclusion, growing your own food at home is of utmost importance. It helps lower your foodprint, provides a relaxing connection with nature, and caters to the demands of busy lives and tight budgets. So, grab your gardening tools and start cultivating your own sustainable oasis!
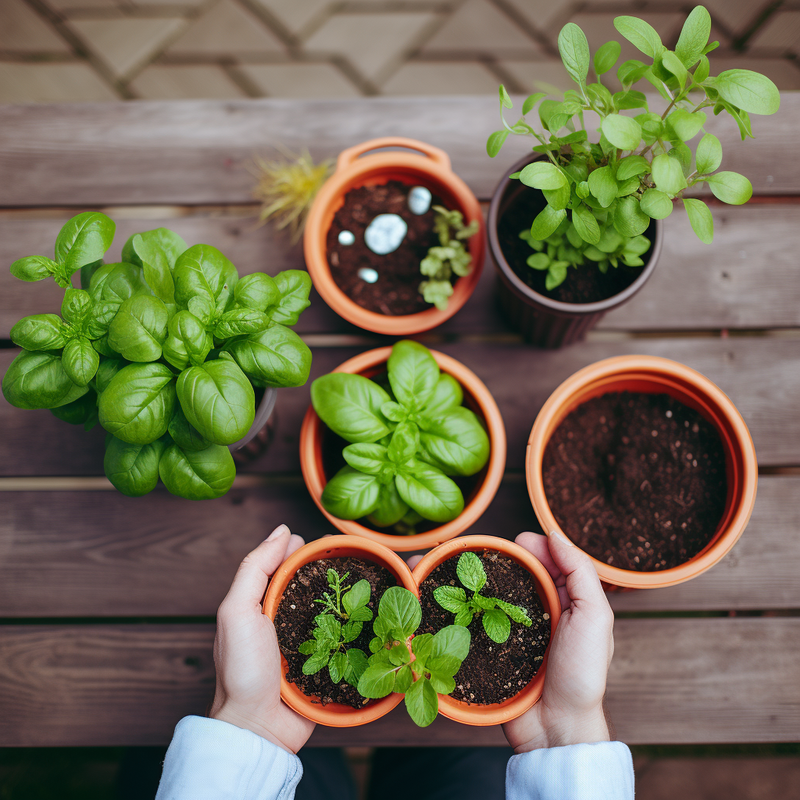
Starting plants from seeds offers several benefits to gardeners. One of the main advantages is the greater control over the results. By starting from seeds, gardeners have the opportunity to select specific varieties that meet their preferences and growing conditions. This level of control allows them to cultivate plants with desired traits, such as improved flavor, disease resistance, or more vibrant colors.
Additionally, starting from seeds increases efficiency in food production. It enables gardeners to grow a larger quantity of plants at a lower cost compared to buying fully grown seedlings. This ultimately leads to a more abundant harvest and ensures a continuous supply of fresh and healthy produce.
Another major benefit is the ability to start gardening earlier in the season. With seeds, gardeners can take advantage of a longer growing season by sowing them indoors or in a greenhouse. This early start provides plants with a head start in their growth, resulting in earlier blooms and earlier access to homegrown vegetables.
The advantages of starting from seeds extend beyond just control, efficiency, and a longer growing season. It also promotes greater satisfaction in witnessing the entire life cycle of a plant, from the humble seed to a flourishing and fruitful organism. It allows gardeners to develop a deeper connection with nature and a sense of accomplishment in nurturing their plants from the very beginning.
Introduction:
Choosing the right seeds for your garden is a crucial step in ensuring a successful planting season. The quality and suitability of the seeds you select will directly impact the growth, health, and productivity of your plants. By taking the time to carefully research and consider your options, you can increase the likelihood of a bountiful harvest and save yourself from potential disappointment. In this article, we will explore key factors to consider when choosing the right seeds, including the plant variety, seed quality, and growing conditions, empowering you to make informed decisions and set your garden up for success.
Seed packets and seed trays are both popular methods for starting a garden from seed. Each option has its own benefits and considerations, and the choice between the two depends on several factors.
Seed packets offer a convenient and cost-effective way to start a garden from seed. They are readily available at garden centers and online, and they often contain a variety of seeds in one packet. This makes it easy to experiment with different plants without purchasing multiple trays or containers. Seed packets also typically include instructions on proper planting depth, spacing, and care, making them suitable for beginner gardeners.
On the other hand, seed trays provide more control and flexibility in the germination process. With seed trays, gardeners have the ability to control the temperature, moisture levels, and light exposure, leading to higher germination rates. Seed trays also allow for better organization and monitoring of individual plants. Transplanting seedlings from trays to the garden is also easier for some plants, as their roots remain undisturbed.
When choosing between seed packets and seed trays, several factors should be considered. The type of plant is important, as some plants have specific germination requirements that may be better suited to one method over the other. Additionally, growing conditions, such as the availability of sunlight and space, should be taken into account. Lastly, the desired timeline is a consideration - seed trays often accelerate the germination process, while seed packets may take longer.
In conclusion, both seed packets and seed trays offer advantages and disadvantages when starting a garden from seed. While seed packets are convenient and cost-effective, seed trays provide more control and flexibility. The choice between the two methods depends on the type of plant, growing conditions, and desired timeline. Ultimately, selecting the right method will lead to successful germination and a thriving garden.
When planning a vegetable garden, it is important to consider the types of vegetables that are suitable for your specific climate and growing season. Some vegetables thrive in cooler temperatures, while others prefer warmer conditions. To determine which vegetables are most suitable for your area, it is essential to know your local first and last frost dates.
Cool-season vegetables are those that can tolerate colder temperatures and can be planted in early spring or late summer. These include leafy greens such as lettuce, spinach, and kale, as well as root vegetables like carrots, radishes, and beets. Other cool-season options include broccoli, cauliflower, and peas.
On the other hand, warm-season vegetables require higher temperatures to grow successfully. These vegetables should be planted after the last frost date when the soil has warmed up. Some popular warm-season choices are tomatoes, peppers, cucumbers, zucchini, and eggplant. Additionally, corn, beans, and melons are also considered warm-season vegetables.
To determine the first and last frost dates for your area, you can consult the USDA Plant Hardiness Zone Map or contact your local agricultural extension office. This information is crucial for deciding when to start planting different types of vegetables. By planting cool-season vegetables too early or warm-season vegetables too late, you risk damaging the plants or preventing them from reaching their full potential.
In conclusion, when planning your vegetable garden, consider the types of vegetables that are suitable for your climate and growing season. Take into account the distinction between cool-season and warm-season vegetables, and determine the first and last frost dates for your area to ensure successful planting.
Preparing your garden space is an essential step towards creating a successful and thriving garden. Whether you are a seasoned gardener or just starting out, taking the time to properly prepare your garden space can greatly improve the overall health and productivity of your plants. In this article, we will guide you through the necessary steps to prepare your garden space, from clearing the area and improving the soil quality to planning the layout and ensuring proper drainage. By following these guidelines, you can create a fertile and well-organized garden space that will provide you with bountiful harvests and a beautiful outdoor sanctuary to enjoy.
When selecting a garden bed or container, there are several factors to consider. First and foremost, you need to assess the water and light requirements of the plants you intend to grow. Some plants thrive in full sun, while others prefer shade or partial shade. Therefore, choose a garden bed or container that can provide the appropriate amount of light for your plants.
Size is another important factor to consider. The size of the garden bed or container should be suitable for the plants you want to grow and the available space you have. Consider the root depth and space requirements of your plants to ensure they have enough room to grow.
Drainage is crucial to prevent waterlogging and root rot. Look for garden beds or containers that have drainage holes or the ability to add drainage systems. This will allow excess water to escape and prevent water from pooling around the plants.
The materials used for the garden bed or container also play a role. Materials like wood, plastic, or metal can affect the temperature, moisture, and overall health of your plants. Consider the aesthetic aspect, durability, and suitability of the materials to your gardening needs.
Other relevant factors include accessibility, maintenance, and cost considerations. Ensure that the garden bed or container is easily accessible for planting, harvesting, and maintenance tasks. Consider the time and effort required to upkeep the garden bed or container. Lastly, assess your budget and choose a garden bed or container that fits your financial means.
In conclusion, when selecting a garden bed or container, you should consider the water and light requirements, size, drainage, materials, as well as accessibility, maintenance, and cost considerations. Taking into account these factors will help ensure the success of your gardening endeavors.
Ensuring proper drainage and soil quality is crucial for promoting healthy plant growth and maximizing agricultural yield. There are several measures that can be implemented to achieve this.
One key step is grading the land to promote runoff. By creating a slight slope, water can easily flow away from the plants and prevent waterlogging. This can be done by adjusting the elevation of the land or by creating ditches or swales to direct water away from the planting area.
Installing drainage pipes is another effective measure. These pipes can be placed underground to redirect excess water to a suitable drainage outlet such as a storm drain or a nearby water body. This helps prevent water accumulation and ensures proper soil moisture levels.
Testing the soil for nutrient levels and pH is equally important. This can be done by collecting soil samples and sending them to a laboratory for analysis. The results will provide information on the soil's nutrient content and acidity, allowing appropriate amendments to be made. By addressing nutrient deficiencies and adjusting pH levels, the soil can become more fertile and conducive to plant growth.
Maintaining well-draining soil is vital as poor drainage can lead to various consequences. Excessive moisture in the soil can drown plant roots, preventing proper absorption of water and nutrients. This can result in stunted growth, wilting, and even plant death. Furthermore, waterlogged soil can favor the growth of harmful microorganisms that cause root rot and other diseases.
In conclusion, to ensure proper drainage and soil quality, it is essential to grade the land, install drainage pipes, and test the soil for nutrient levels and pH. By doing so, plants can prosper, and the negative consequences of poor drainage and soil quality can be mitigated.
Introduction:
Planting seeds is a fundamental act of nurturing and growth, symbolizing the beginning of life and the potential for future abundance. Whether in a garden, a farm, or even metaphorically in our personal journeys, planting seeds requires patience, care, and a belief in the transformative power of nature. From delicate flowers to towering trees, the act of planting seeds connects us to the cycles of the earth, reminding us of the importance of sustainability and our role as stewards of the environment. In this article, we will explore the art of planting seeds, discussing the preparation, sowing, and nurturing required to help these tiny miracles sprout into thriving plants. We will also delve into the potential benefits, such as providing nourishment, beautifying spaces, and fostering a sense of connection to nature. So, let's dig in and discover the wonders of planting seeds.
Planting larger seeds like beans and squash requires proper soil preparation, spacing, and attentive care and maintenance. Here are the steps to successfully plant and care for these seeds:
1. Soil preparation: Choose a sunny location with well-draining soil. Remove any weeds or debris from the planting area. Amend the soil with organic matter to improve fertility and drainage.
2. Spacing: For beans, sow the seeds 1-2 inches deep and space them 4-6 inches apart, leaving 18-24 inches between rows. For squash, plant the seeds 1 inch deep and space them 2-3 feet apart, leaving 4-6 feet between rows.
3. Care and maintenance: Water the seeds immediately after planting and keep the soil consistently moist throughout the growing season. Avoid overwatering, as this can lead to fungal diseases. Apply mulch around the plants to conserve moisture, suppress weeds, and regulate soil temperature. Provide support for climbing varieties of beans to prevent them from sprawling on the ground.
4. Ideal growing conditions: Beans and squash thrive in full sun for at least 6-8 hours a day. They require moderate moisture levels and well-draining soil to prevent waterlogging, which can cause root rot. Regularly monitor for pests such as aphids or cucumber beetles and take appropriate action if necessary.
By following these steps and providing the ideal growing conditions, you can successfully plant and care for larger seeds like beans and squash. Enjoy the bountiful harvest of delicious and nutritious vegetables.
Planting smaller seeds such as onions and herbs may require special attention and care. Follow these steps to ensure successful germination and growth.
First, prepare the soil by loosening it to a depth of about 6 inches. Remove any weeds, rocks, or debris that may hinder the growth of the smaller seeds. Ensure that the soil is well-drained and rich in nutrients.
Next, sow the seeds at the appropriate depth. Generally, smaller seeds like onions and herbs need to be planted at a shallow depth, about 1/4 to 1/2 inch deep. Avoid planting them too deep as this can slow down or prevent germination.
When it comes to soil quality, ensure that the soil is well-drained and fertile. Add compost or well-rotted manure to improve its nutrient content. Smaller seeds require a fine-textured soil to easily penetrate and establish roots.
Timing is crucial for planting smaller seeds. Onions and certain herbs thrive in cooler temperatures. Plant these seeds in early spring or late summer to take advantage of the cooler weather. Follow the instructions on the seed packet for specific timing requirements.
To aid in germination and growth, water the seeds gently but consistently to keep the soil moist. Avoid overwatering, as it can lead to fungal diseases or rot.
Lastly, provide protection from harsh weather conditions and pests. Consider using row covers or netting to shield the young plants. Mulching can also help conserve moisture and suppress weed growth.
By following these tips and providing the ideal conditions, you can ensure successful germination and growth of smaller seeds like onions and herbs.
Caring for Seedlings Introduction:
Caring for seedlings is an essential part of the plant cultivation process, as it lays the foundation for healthy and vigorous plants. Seedlings require specific attention and care to ensure they survive and thrive as they transition from seed to mature plant. By providing the right conditions, such as proper watering, adequate light, and suitable temperature, gardeners and plant enthusiasts can maximize the chances of successful growth and development for their seedlings. Taking the time to care for seedlings and understanding their unique needs is crucial for establishing a strong and vibrant garden or nursery. In the following headings, we will explore various aspects of caring for seedlings, including watering techniques, light requirements, and the role of temperature in their growth.
Watering and keeping soil moist is essential for the health and growth of plants. Adequate moisture ensures that plants can absorb essential nutrients, maintain turgidity, and perform important physiological processes such as photosynthesis and transpiration. Here are some guidelines to achieve this:
Using a mister or small watering can can help maintain the right moisture level in the soil. By gently spraying water on the soil surface, you can provide a fine mist that keeps the soil moist without making it soggy. This is particularly helpful for delicate plants or newly sown seeds.
It's important to let the soil slightly dry between waterings. Soggy soil can lead to root rot and other fungal diseases. To determine when to water, you can use the finger test. Simply stick your finger about an inch into the soil, and if it feels dry, it's time to water. However, if it feels slightly moist, hold off watering for a day or two.
Another effective method to keep newly formed roots moist without risking rot is bottom watering. This method involves placing the pot in a shallow tray filled with water, allowing the roots to pull up water as needed. This ensures that the roots have access to water without overwatering the soil.
In conclusion, watering and maintaining soil moisture is crucial for plant health. Using a mister or watering can, allowing the soil to dry slightly between waterings, and employing bottom watering techniques are effective ways to ensure the right moisture levels for your plants. Remember, a well-hydrated plant is a happy and thriving plant.
To provide adequate sunlight and warmth for indoor plants, it is crucial to consider their placement and lighting needs. One effective method is to place plants near a south-facing window. This location ensures maximum exposure to natural sunlight throughout the day, which is essential for proper plant growth.
However, during winter months or if your home lacks a south-facing window, supplementing with grow lights is highly recommended. Grow lights mimic natural sunlight, providing plants with the necessary light spectrum they need to thrive. It is important to position the grow lights at an optimal distance from the plants, usually about 6-12 inches, and adjust the height as the plants grow.
Apart from light, maintaining appropriate warmth is equally important. The ideal temperature range for most indoor plants is between 60-75 degrees Fahrenheit (15-24 degrees Celsius). Avoid placing plants in areas with extreme temperature fluctuations or drafts, as they can stress the plants and hinder their growth.
Regular and proper watering is also essential for indoor plants. Overwatering can lead to root rot, while underwatering can cause wilting and stunted growth. Before watering, check the moisture level of the soil by inserting your finger about an inch deep. If it feels dry, water the plant until it evenly moistens the soil. Avoid letting plants sit in standing water, as this can result in root issues.
Maintaining appropriate moisture levels is vital in providing both sunlight and warmth. Avoid dry indoor environments by using a humidifier if necessary. Misting the plants occasionally can also help increase humidity levels around them.
By following these guidelines, you can provide adequate sunlight and warmth for your indoor plants, ensuring their healthy growth and vibrant appearance.
Transplanting seedlings is an essential step in the gardening process to ensure successful growth and development of your plants. Below is a step-by-step guide on how to transplant seedlings into the garden soil:
1. Start by purchasing or starting seedlings indoors. You can purchase seedlings from a nursery or start them from seeds in trays or pots indoors. This process allows the seedlings to establish strong roots before being exposed to the outdoor environment.
2. Choose the appropriate vegetables for transplanting. Most vegetables can be transplanted, including tomatoes, peppers, cucumbers, broccoli, and lettuce. However, some vegetables like carrots, radishes, and beans are best directly sown in the garden soil.
3. Prepare the garden soil. Clear the selected area of weeds and debris. Loosen the soil with a garden fork or tiller to ensure good drainage and air circulation.
4. Dig small holes in the garden soil. The holes should be deep and wide enough to comfortably fit the root ball of each seedling.
5. Carefully remove the seedlings from their containers. Gently loosen the roots and brush off excess soil from the root ball. Be cautious not to damage the delicate roots.
6. Place each seedling into a prepared hole. Ensure that the top of the root ball is level with the garden soil surface. Fill the hole gently with soil, pressing it down around the seedling to eliminate air pockets.
7. Water the transplanted seedlings immediately after planting. This helps to settle the soil and establish good root-to-soil contact. Water deeply and avoid watering the leaves to prevent disease.
8. Provide proper care for your transplanted seedlings. Regularly water them, keeping the soil moist but not soaked. Protect the seedlings from harsh weather and pests by using mulch and appropriate barriers.
By following these step-by-step instructions, you can successfully transplant your seedlings into the garden soil, giving them the best chance for growth and productivity.
 Author: Statsfolio